Must-Have Supplies for Seamless Drywall Repair: A Complete Checklist
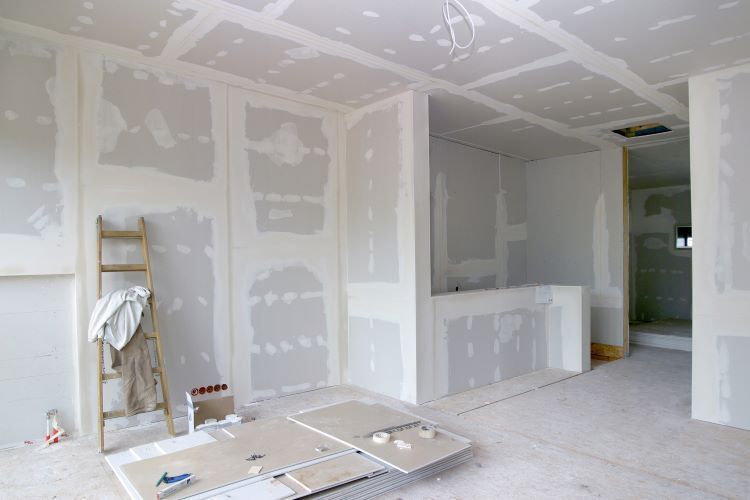
Drywall repair can range from small patch-ups to more extensive repairs, especially after minor accidents, water damage, or home improvements. Whether you’re tackling it as a DIY project or just want to be informed about what a professional repair entails, having the right supplies on hand makes all the difference in achieving a seamless finish. At Regina Drywallers, we know the ins and outs of drywall repair and want to share the essentials with you. Here’s your complete checklist for a smooth, effective drywall repair.
1. Patching Compound or Spackle
- Purpose: Patching compound, often known as spackle, is the cornerstone of drywall repair. It fills holes, dents, and minor imperfections, providing a smooth, even surface for painting.
- Recommendation: Opt for a high-quality spackle that’s easy to sand and doesn’t shrink as it dries. For larger holes, joint compound is typically more effective due to its thicker consistency.
2. Drywall Repair Patch or Mesh Tape
- Purpose: For holes larger than nail or screw punctures, a drywall repair patch or mesh tape is necessary. These products reinforce the damaged area, providing a firm foundation to hold the compound.
- Recommendation: Self-adhesive fiberglass mesh tape is ideal for medium-sized holes, while metal or aluminum patches are best for larger holes. Make sure to measure the hole beforehand to get the correct size.
3. Putty Knife
- Purpose: A putty knife is used to apply spackle, joint compound, or patching compound, helping you to spread it smoothly over the repair area.
- Recommendation: Keep a few sizes on hand, like a 2-inch knife for small holes and a 6-inch or 12-inch knife for larger repairs. Stainless steel blades work well for easy cleaning and a smoother finish.
4. Sandpaper and Sanding Block
- Purpose: Sanding is essential for achieving a flat, seamless finish. Sandpaper helps smooth out compound edges, making the patched area blend in with the surrounding wall.
- Recommendation: Use a sanding block for better control and even pressure. For drywall repair, start with medium-grit sandpaper (120-150 grit) for initial smoothing, then move to finer grit (220 grit) for a polished finish.
5. Utility Knife
- Purpose: A utility knife is a versatile tool for drywall repairs, ideal for cutting drywall patches, trimming excess compound, and smoothing edges.
- Recommendation: Invest in a high-quality utility knife with replaceable blades. A sharp blade reduces tearing and produces cleaner cuts, which is crucial for patching holes seamlessly.
6. Primer
- Purpose: Primer preps the repaired surface for paint, ensuring the patch blends smoothly and doesn’t stand out from the rest of the wall.
- Recommendation: Choose a stain-blocking primer for areas that have been damaged by water or smoke. For smaller repairs, a spray primer can work well for a quick application.
7. Paint Matching the Existing Wall Color
- Purpose: Once the repair is finished, painting over it with a matching color completes the seamless look.
- Recommendation: If you don’t have leftover paint, many hardware stores offer color-matching services. It’s essential to blend the color as closely as possible to avoid noticeable patches.
8. Dust Mask or Respirator
- Purpose: Sanding drywall produces fine dust that can irritate your respiratory system, making a dust mask or respirator essential for safe, dust-free breathing.
- Recommendation: Use a high-quality, well-fitted mask with a filtration rating, like N95, to protect yourself from dust particles.
9. Drop Cloths or Plastic Sheeting
- Purpose: Repairs, sanding, and painting can be messy, so protecting your floor and furniture with drop cloths or plastic sheeting is important.
- Recommendation: Cloth drop cloths are durable and reusable, while plastic sheeting is more lightweight and disposable. Either option works to keep your space clean and protected.
10. Drywall Saw (Optional)
- Purpose: For larger repairs where a full patch is needed, a drywall saw can help cut out damaged areas cleanly.
- Recommendation: Use a drywall-specific saw, which is typically compact and serrated for more controlled cuts. Electric multi-tools with drywall blades can also work well for larger projects.
Additional Tips for Seamless Drywall Repair
- Layer Your Compound: Apply multiple thin layers of compound rather than one thick one. This helps prevent cracking and makes sanding easier.
- Feather the Edges: When spreading compound, feather the edges outward to blend the patch with the wall seamlessly.
- Check for Imperfections: After sanding, shine a light across the patch to reveal any imperfections. A quick touch-up at this stage can save time and create a smoother result.
- Allow for Adequate Drying: Compound and primer both need ample drying time to avoid issues with the final finish.
Final Thoughts
Whether you’re fixing small dents or patching larger holes, having the right supplies on hand makes drywall repair more manageable and leads to a much better outcome. At Regina Drywallers, we understand that each repair job is unique, and we’re here to help ensure your walls look as good as new. With this checklist, you’ll be well-prepared for any drywall repair project that comes your way!
You Might Also Enjoy:

Contact Us!
